
Adding Users
There is no limit to the number of users you can add. Feel free to add it by following the steps below.
-
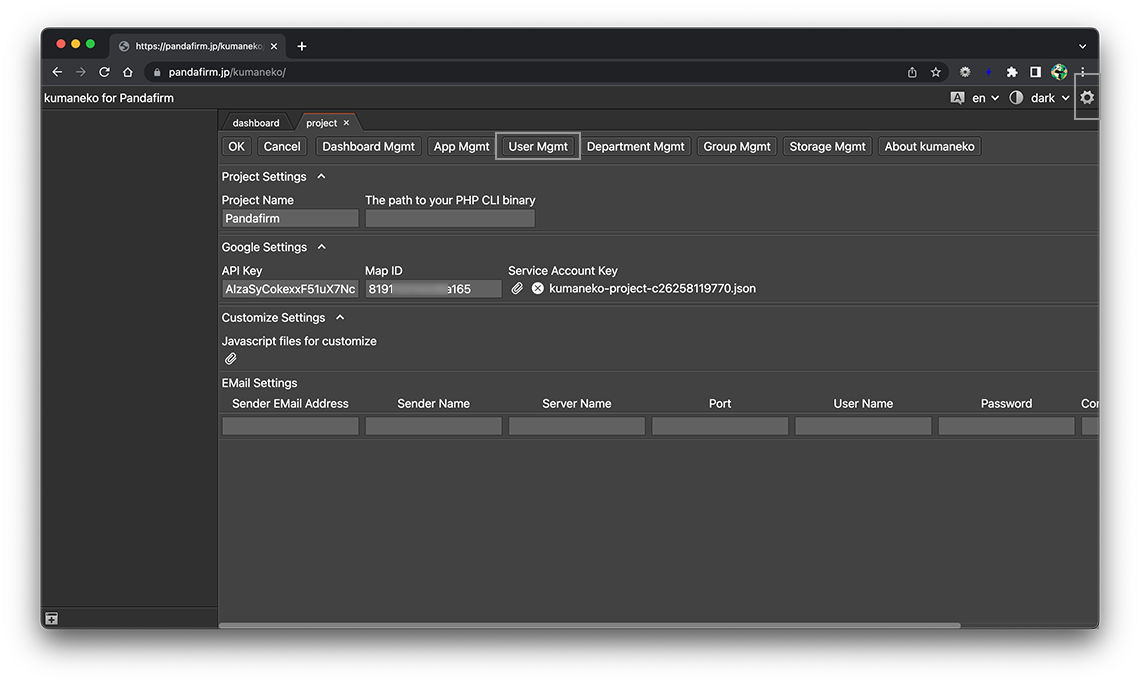
Click the gear button on the upper right of the screen to display the project setting screen, and click the "User Mgmt" button in the header area.
-
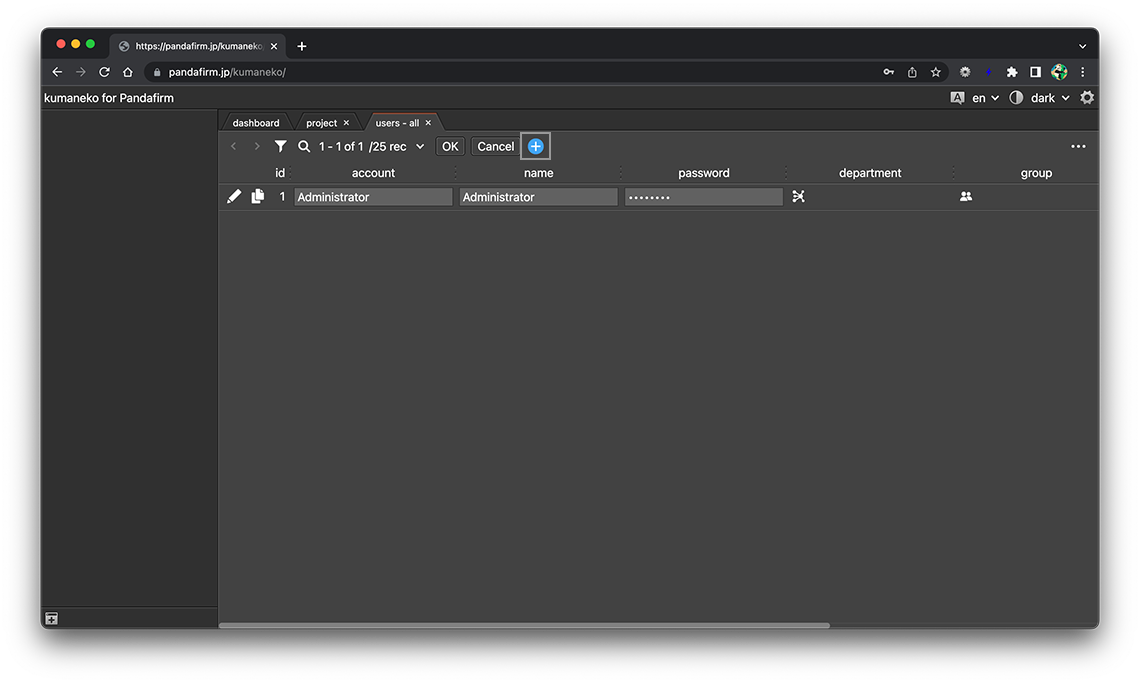
The user list will be displayed in the work area, so click the "+" button.
You can switch the content by clicking the tab at the top of the work area.
-
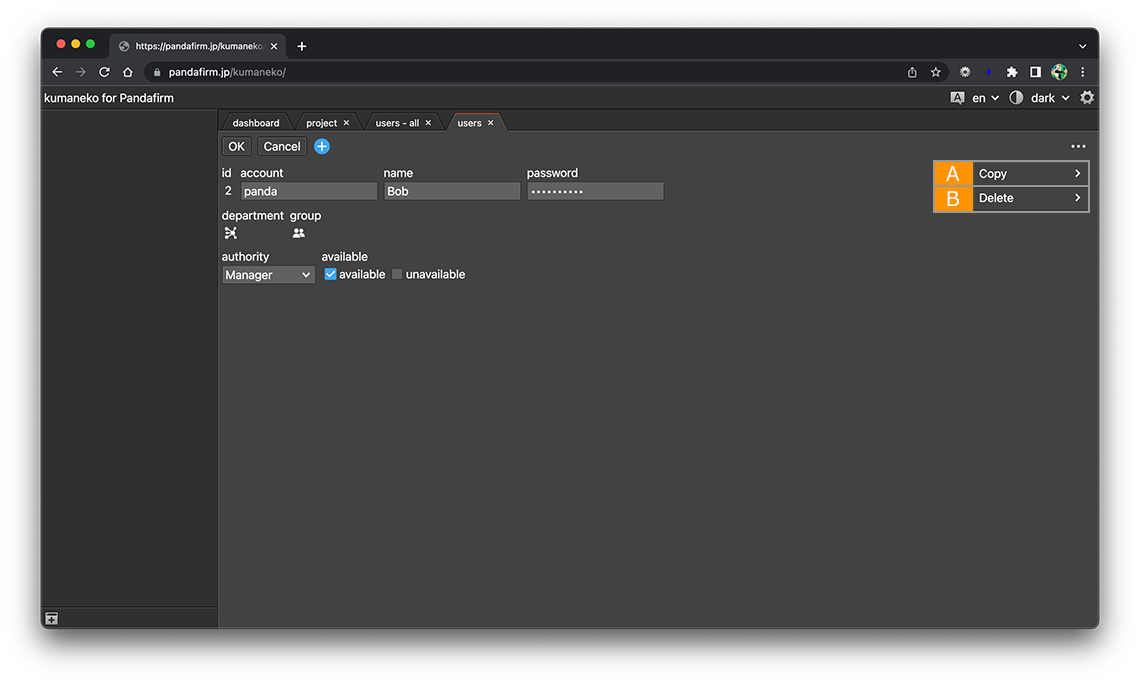
Enter the required items and click the "OK" button.
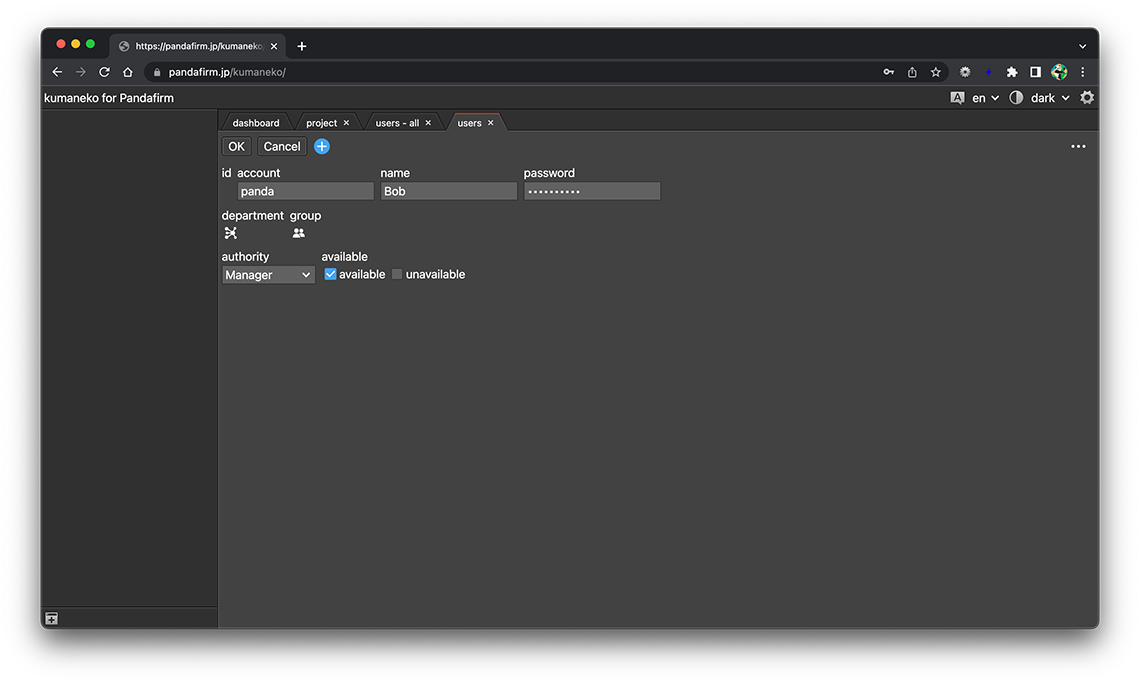
- account:
-
An account ID used to log in to kumaneko.
You can use alphanumeric characters and special characters.
Single quotation and double quotation cannot be used.
- name:
-
The name of the user that will appear on kumaneko.
- password:
-
An password used to log in to kumaneko.
Single quotation and double quotation cannot be used.
- department:
-
The departments to which the user belongs.
- References:
- group:
-
The groups to which the user belongs.
- References:
- authority:
-
Select from the following.
- Administrator:
-
Full access
- Manager:
-
Project settings cannot be changed
- Staff:
-
App cannot be created
- Guest:
-
Can only view records created by oneself
You can also obtain the login user's permissions and make various customizations.
- References:
- available:
-
Usage status
If you select "unavailable", that user will not be able to log in to kumaneko.
-
If you switch the content to the users list, you can confirm that the user has been added.
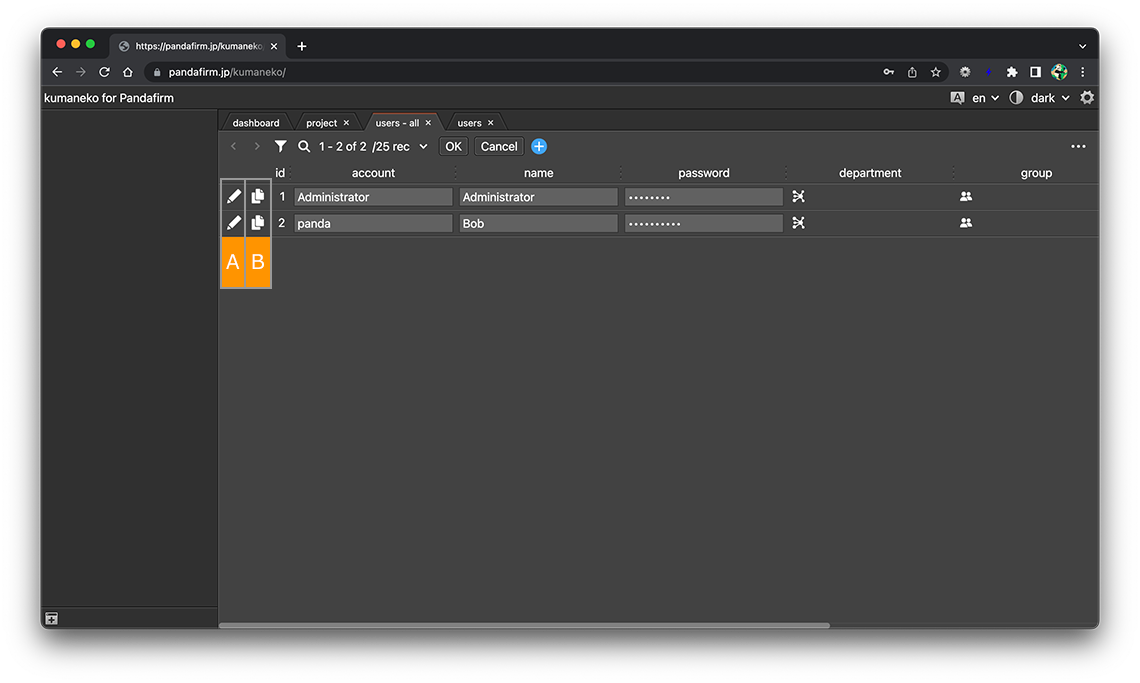
About buttons
- A:
-
Switches to the user edit screen.
- B:
-
Copy the row.
Registered users can also edit on the list screen.
After editing, click the "OK" button.
- References:
-
Registered users can be deleted from both the list and the edit screen.
About buttons
- A:
-
The screen switches to the add screen while leaving the copy source data.
- B:
-
Delete the user.
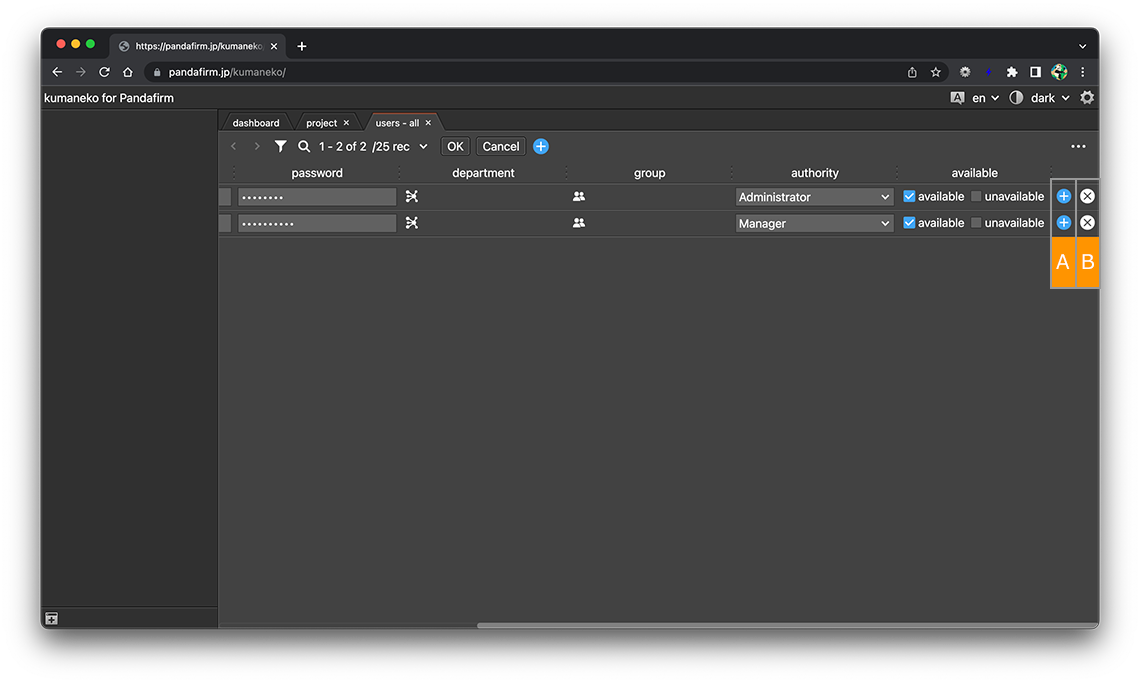
About buttons
- A:
-
Add a new row at the bottom.
- B:
-
Delete the user.
- References: