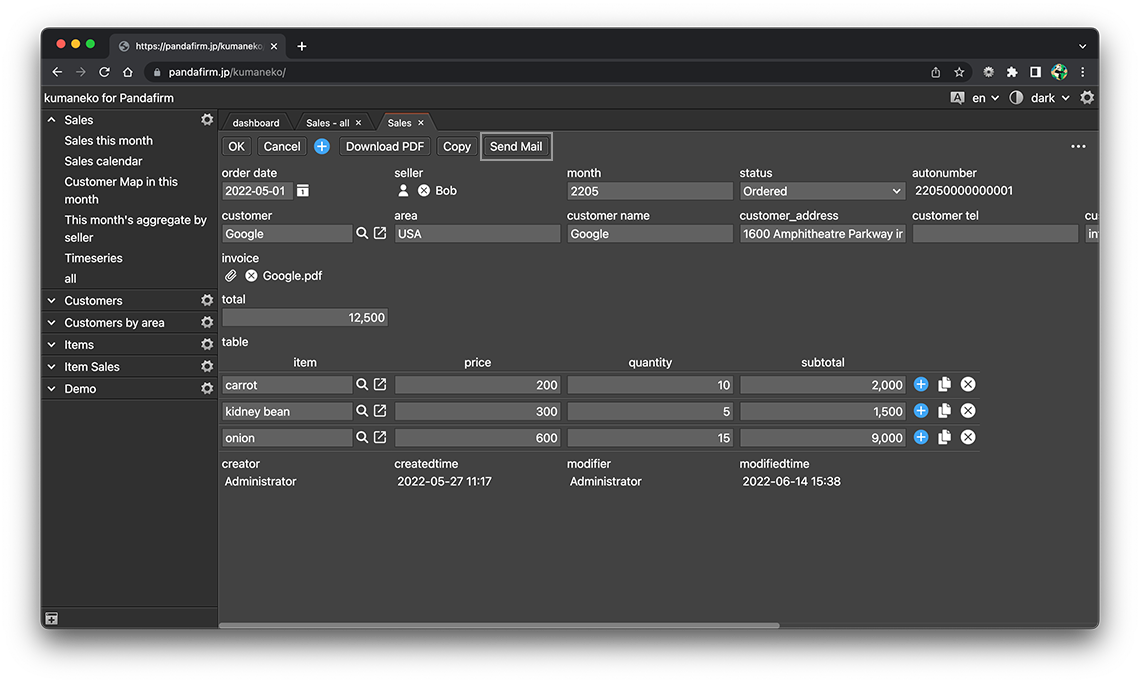
Send mail
If necessary, you can attach the uploaded file to the file field and send an email with the value of the field posted in the body. Creation is done from the "actions" tab of the app settings screen.
To use this Action, the sender mail server information must be registered in the project setting screen.
- References:
If you want to receive emails with kumaneko, please refer to the following.
- References:
Configuring an Action
-
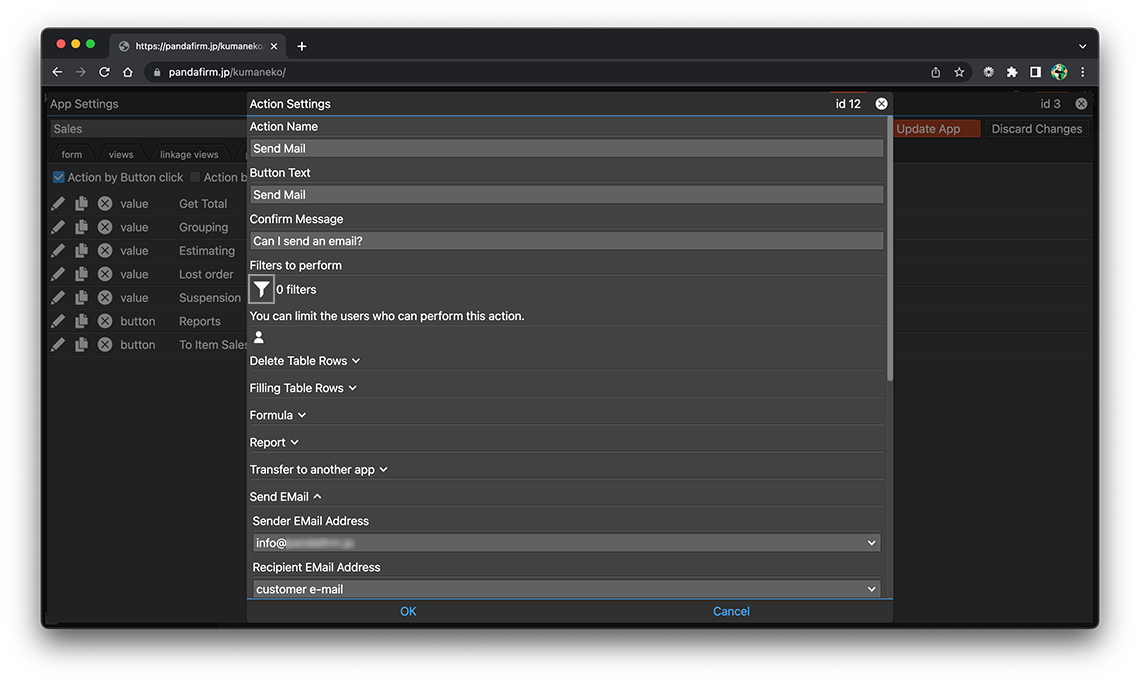
Select "Action by Button click" from the action trigger and click the "Add new action" button.

-
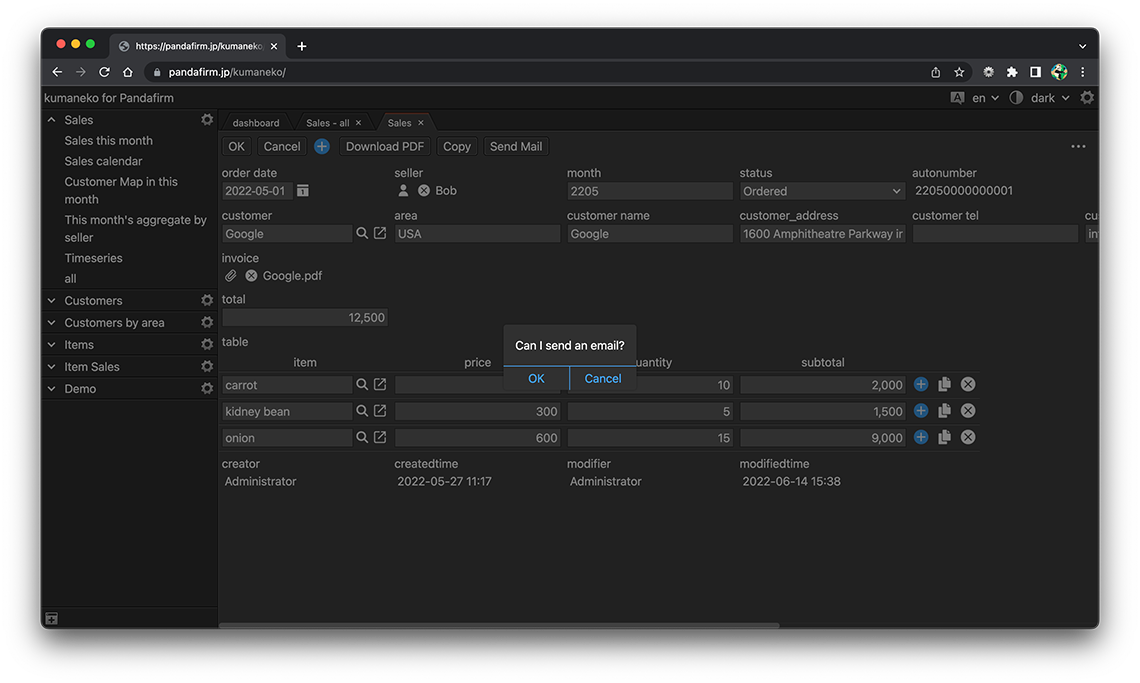
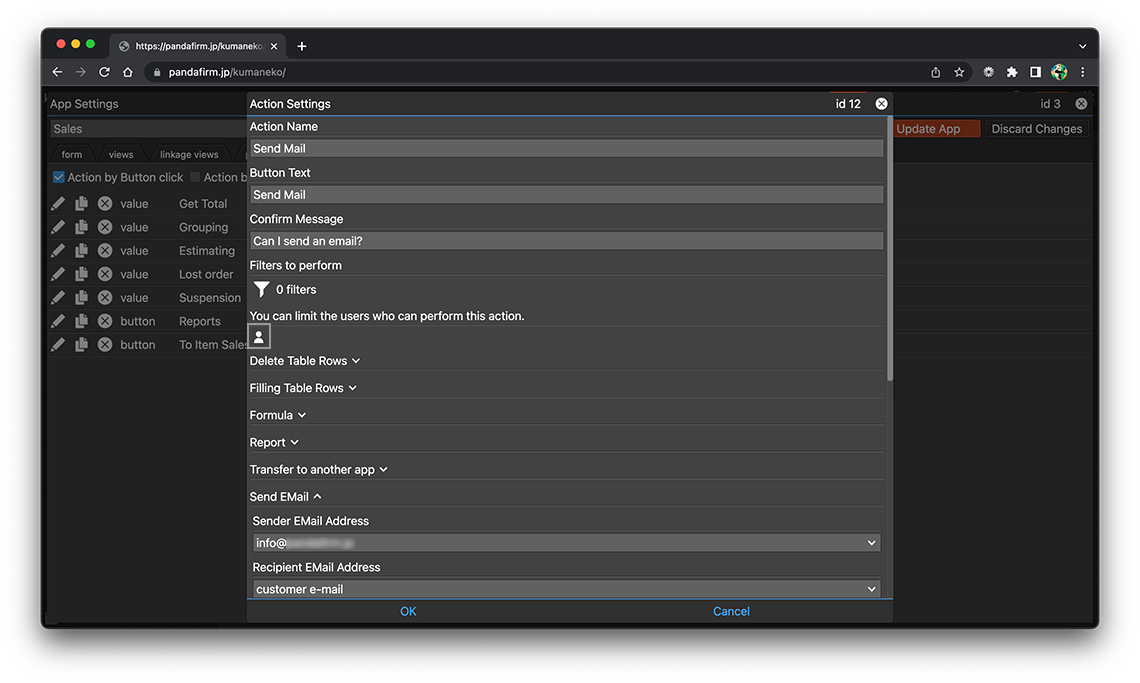
Enter the Action name and the Button Text and the Confirm Message, and in the "Send EMail" section, make the settings that suit your purpose.


- Sender EMail Address:
-
Specify the sender mail server information registered on the project setting screen.
- Recipient EMail Address:
-
Specify the field to be used as the destination email address.
The fields that can be specified are only the text field that "mail" is specified as the input format.
- CC EMail Addresss:
-
Enter if you want to add Cc.
- BCC EMail Addresss:
-
Enter if you want to add Bcc.
- Attachment:
-
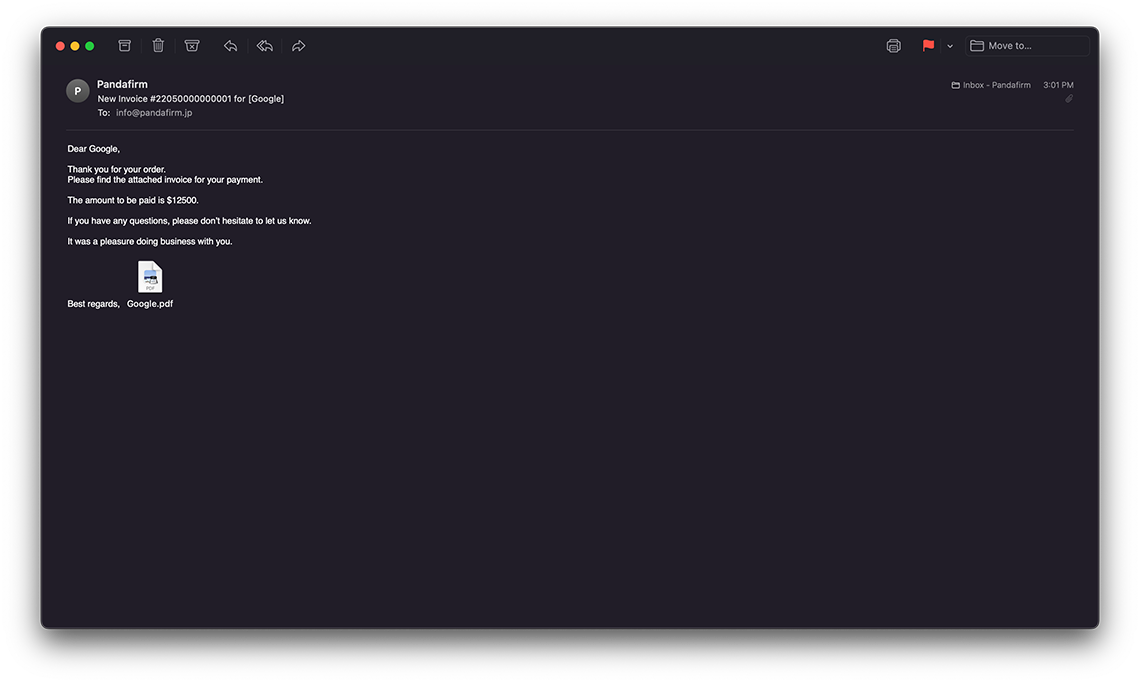
If you want to add the file saved in the field as an attachment when sending an email, specify that field.
If you specify an in-table field for "Recipient EMail Address", only the file field outside the table and the file field in the table row where the target "Recipient EMail Address" is located are targeted.
Only the file field can be specified.
- Subject:
-
Enter the subject.
In the place where you want to replace with the field value, enter the field ID of the field you want to replace by enclosing it in "%".
If you specify an in-table field for "Recipient EMail Address", the replacement source is only the out-of-table field and the table row where the target "Recipient EMail Address" is located.
If the replacement source is a file field, replace it with the file name.
If the replacement source is a lookup field, replace it with the value of "Key Field".
The following fields cannot be specified.
- canvas, spacer
- Body:
-
Enter the email body.
In the place where you want to replace with the field value, enter the field ID of the field you want to replace by enclosing it in "%".
If you specify an in-table field for "Recipient EMail Address", the replacement source is only the out-of-table field and the table row where the target "Recipient EMail Address" is located.
If the replacement source is a file field, replace it with the file name.
If the replacement source is a lookup field, replace it with the value of "Key Field".
The following fields cannot be specified.
- canvas, spacer
- Content Type:
-
Specify the display format of the email body.
If you specify an in-table field in the condition of the record in which the action is executed and the in-table field is the copy / update source, the range is limited to the table row that meets the condition.
-
After completing the settings, click the "OK" button at the bottom of the screen, and then click the "Update App" button on the app settings screen.

- References:
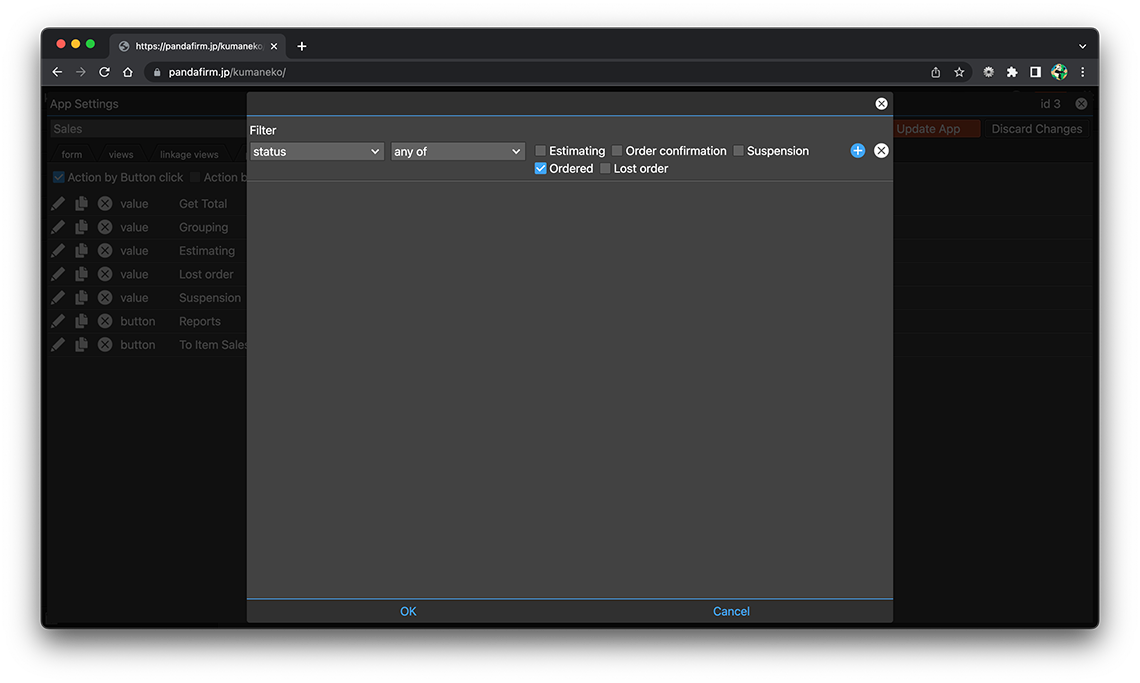
Configure conditions for records that perform actions
If you configure a condition, you can execute the action only when the record meets the set condition. Click the filter button to set the conditions for the record for which you want to perform the action.
- References:
-
Notes when specifying the date period in the record filtering condition
Notes when specifying the dropdown field in the record filtering condition
Notes when specifying the lookup field in the record filtering condition
Notes when entering double quotation in the record filtering condition
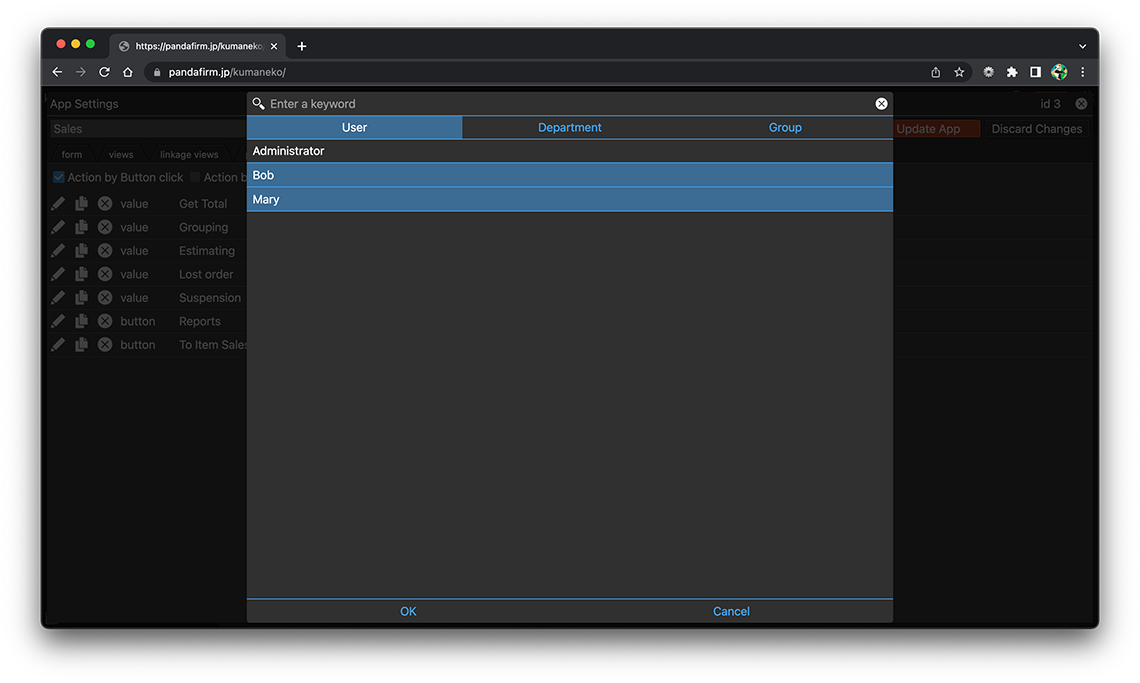
Configure users who can perform actions
If you configure the execute users, you can execute the action only when the logged-in user matches those users. Click the user button to set the user who has the permission to perform the action.
Execute an Action
The action is executed by clicking the button placed on the record add screen, edit screen, or read-only list view.