
Creating Linkage Views
Linkage view is a feature to list the records that meet the specified conditions on the record edit screen.
Configuring a Linkage View
-
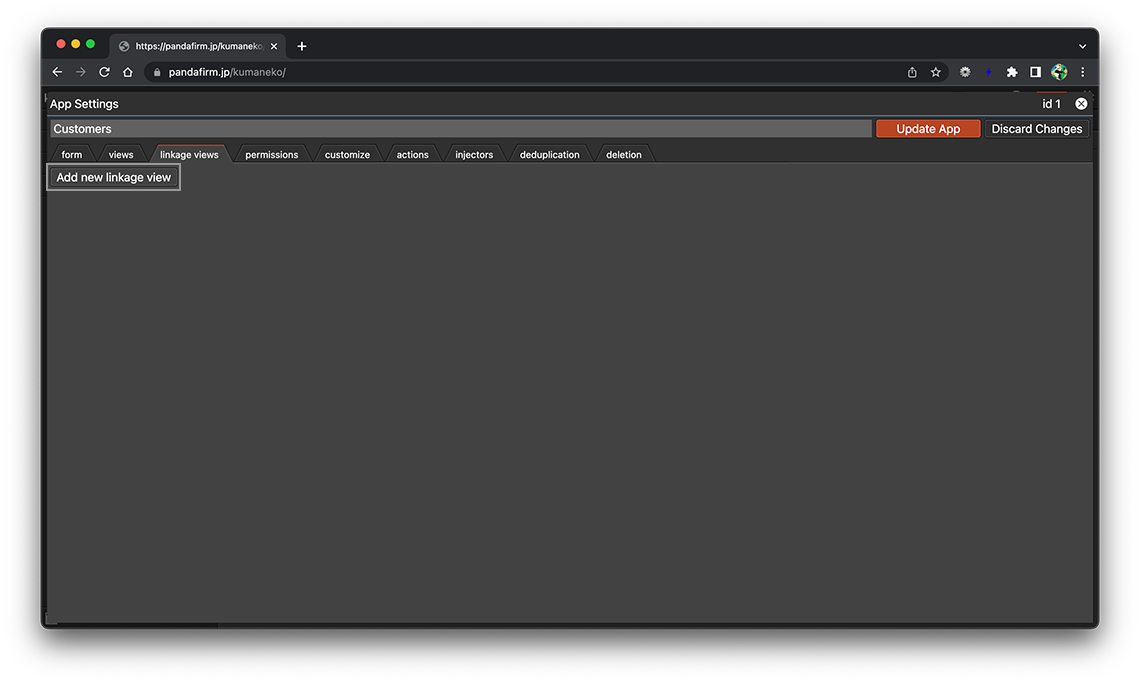
To create a linkage view, click the "linkage views" tab on the app settings screen and click the "Add new linkage view" button.
-
The setting screen will be displayed, so make the settings that suit your purpose.
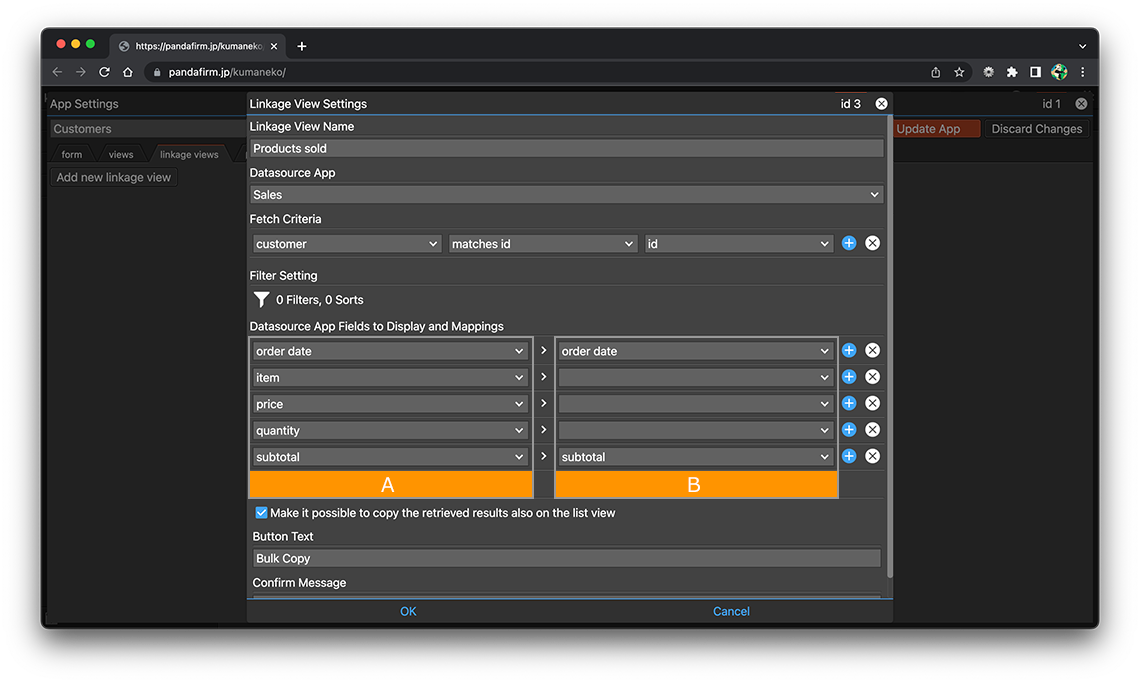

- Datasource App:
-
Specify the app that will be the reference source.
- Fetch Criteria:
-
Specify the fields and conditions for associating the record to be displayed with the record being edited.
The following fields cannot be specified.
- file, canvas, spacer
- Filter Setting:
-
Specify the conditions for narrowing down the records to be displayed and the order of the records.
- References:
-
Notes when specifying the date period in the record filtering condition
Notes when specifying the dropdown field in the record filtering condition
Notes when specifying the lookup field in the record filtering condition
Notes when entering double quotation in the record filtering condition
Fields that are not specified for display are excluded from the sort order.
- Datasource App Fields to Display and Mappings:
-
- A:
-
Specify the field to display.
The following fields cannot be specified.
- spacer
- B:
-
If you want to copy the retrieved results to a field in the table, specify the destination field.
The destination table is overwritten with what you copy.
- Make it possible to copy the retrieved results also on the list view:
-
Bulk copy the contents of "Datasource App Fields to Display" in the read-only list view.
- Button Text:
-
Enter the text to display on the bulk copy button.
If you do not check "Make it possible to copy the retrieved results also on the list view", you do not need to enter anything.
- Confirm Message:
-
Enter the message to be displayed in the confirmation dialog before executing bulk copy.
If you do not check "Make it possible to copy the retrieved results also on the list view", you do not need to enter anything.
-
After completing the settings, click the "OK" button at the bottom of the screen, and then click the "Update App" button on the app settings screen.
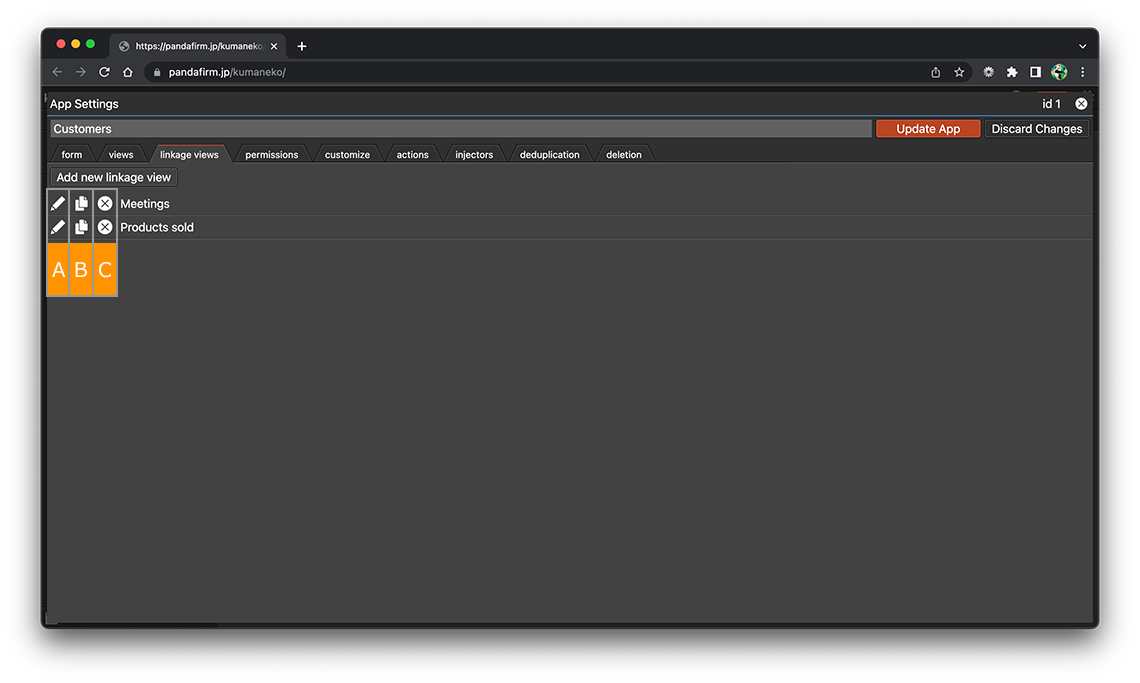
About buttons
- A:
-
Display the linkage view setting screen.
- B:
-
Copy the linkage view.
- C:
-
Delete the linkage view.
-
You can freely change the order by dragging the linkage view name up and down.
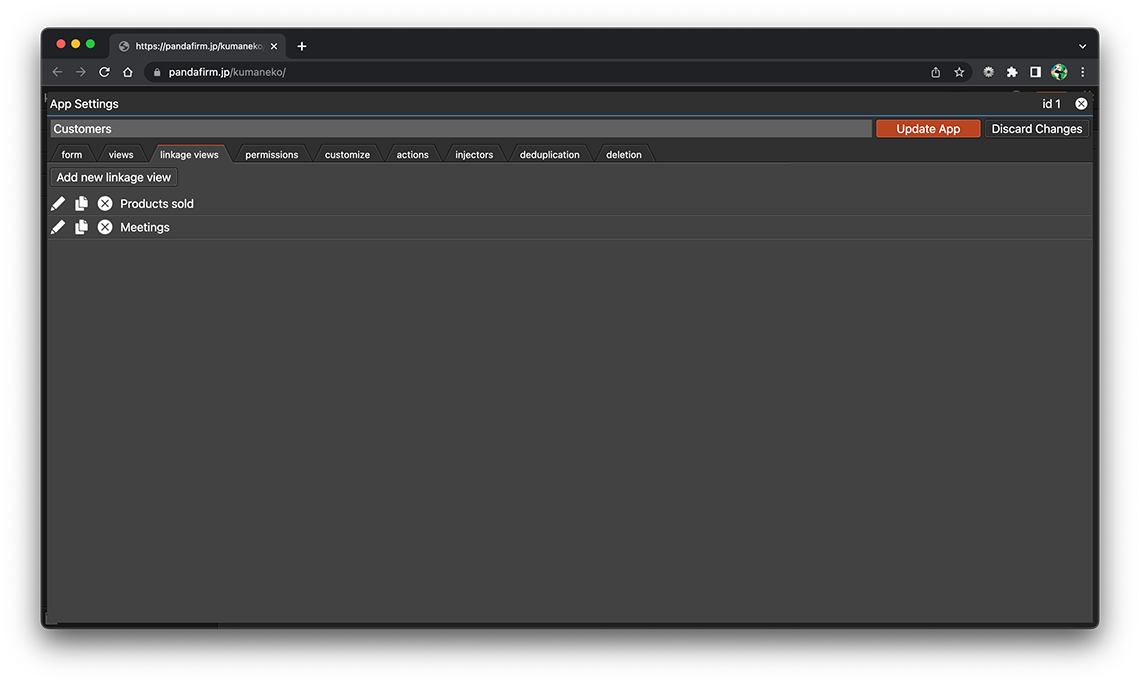
You can make changes to the linkage view afterward even if it is already configured.
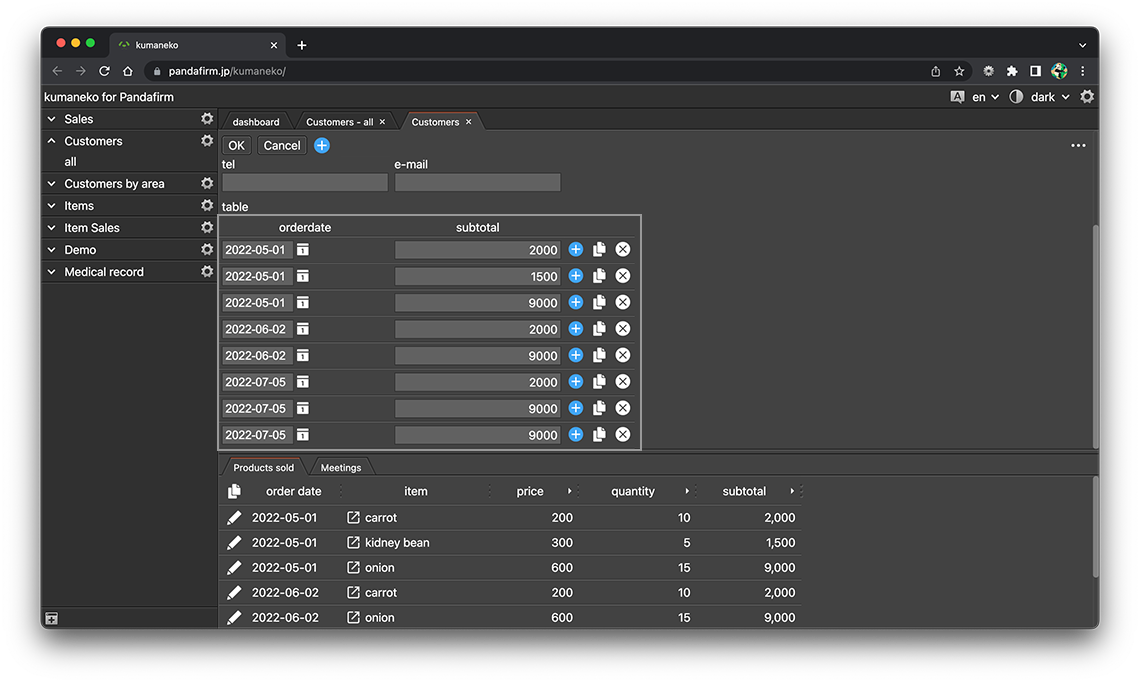
Use a Linkage View
When you edit a record, the records that match the conditions are listed at the bottom of the screen.
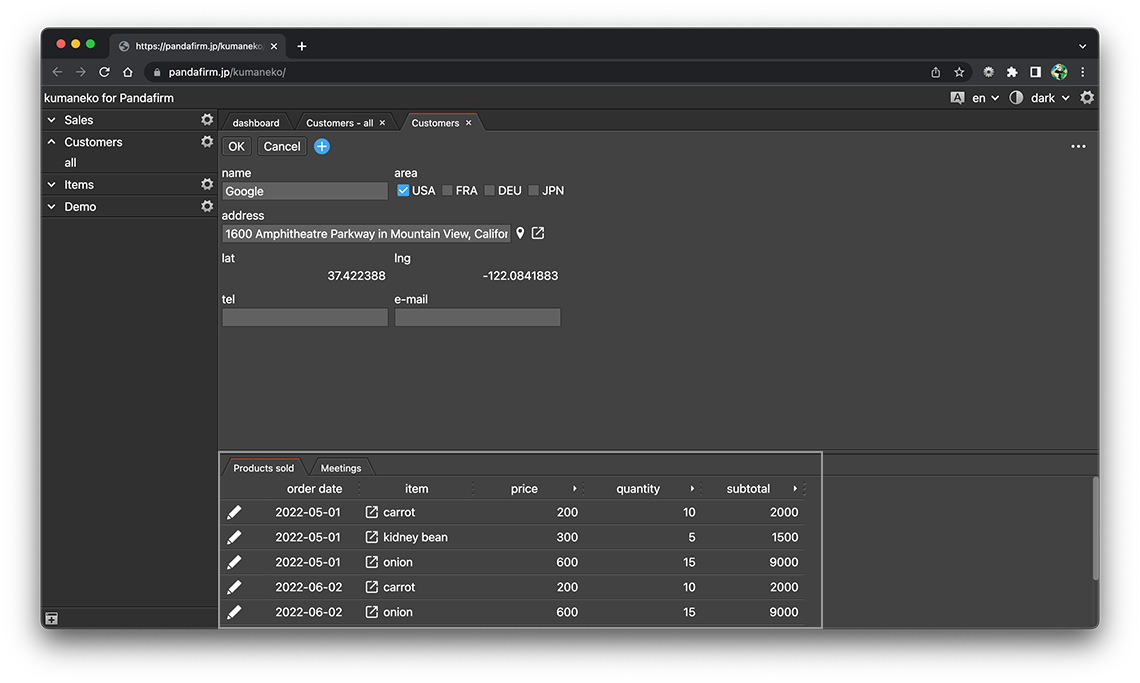
If you have multiple linkage views, switch tabs to display them.
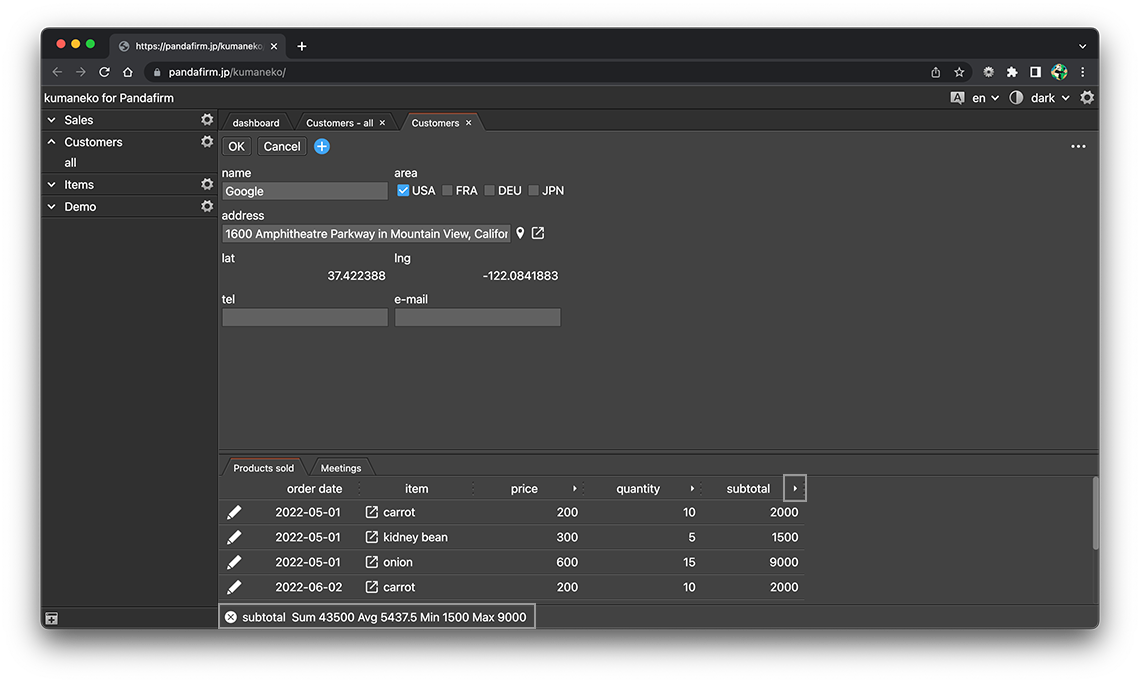
The column header of a numeric field displays an arrow button to the right of it, and you can click it to see the aggregated results at the bottom of the display list.
If you specified a destination field to copy the results to a field in the table, a Copy button appears in the button column of the column header.
Click the displayed copy button to copy.
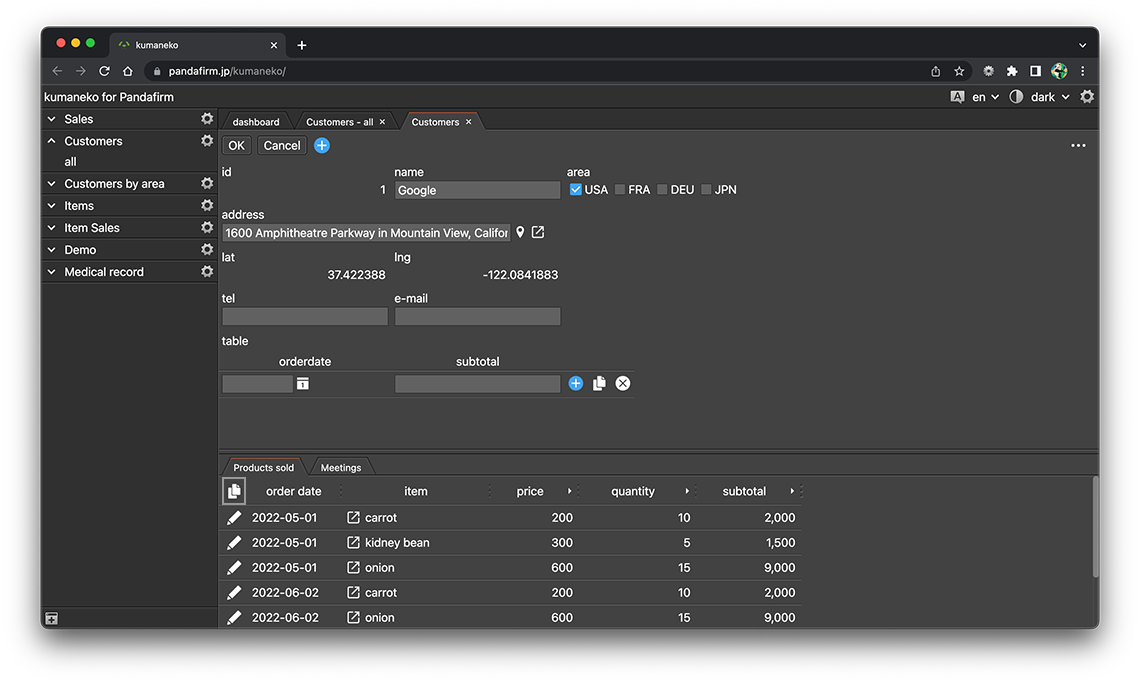
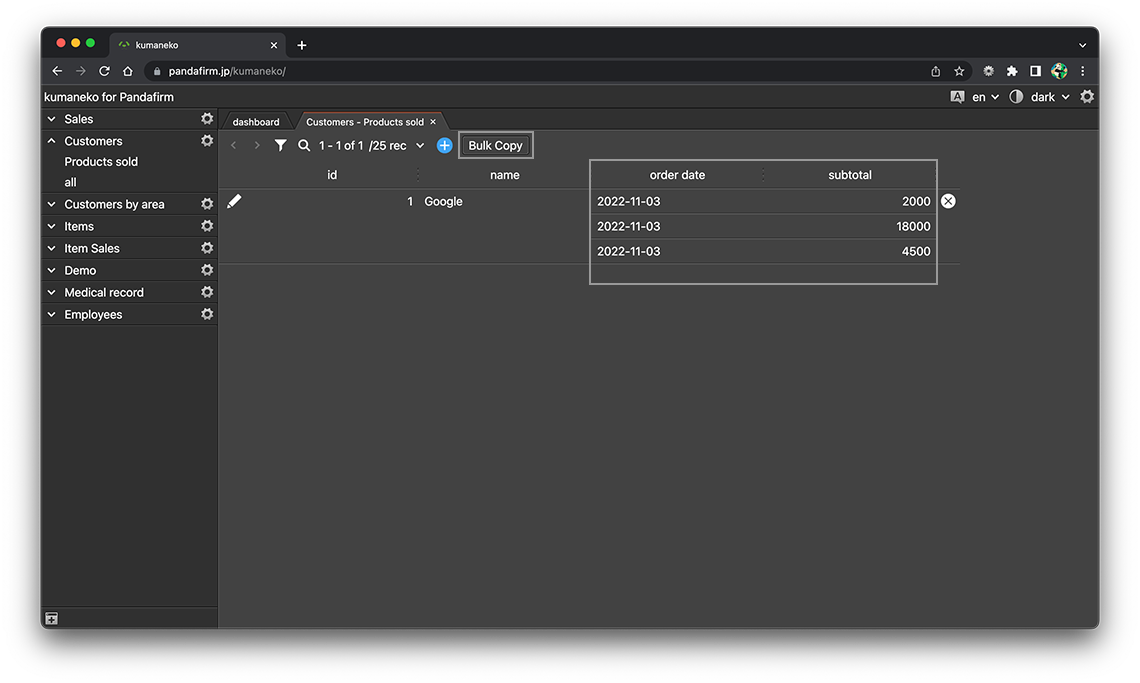
If you check "Make it possible to copy the retrieved results also on the list view", the button will be placed in read-only list view.
When you press the displayed copy button, copy processing will be executed for all records that meet the display conditions of the view.
- References: